Showing posts with label The Monkey Kitchen. Show all posts

Thursday, February 13, 2014

Thin Crust Pizza with Walnut Kale Pesto

We eat more than bananas in the Monkey Kitchen. Last nights dinner of whole wheat thin crust pizza topped with walnut kale pesto, goat cheese, ham, mushrooms, and arugula was by far better than bananas, even though I really do like that fruit too. Several people have asked for the crust recipe, so I thought I would share here.

I often don't know food is picture/share worthy until after it has been consumed 

Whole Wheat Thin Crust 

 Ingredients 
- 2.5 cups whole wheat flour (you can use white flour or any combination of white and whole wheat flour if you prefer)
- 2 Tablespoons cold butter
- 1 Tablespoon yeast
- 1 cup warm water
- pinch of salt (optional)

I make this dough using my Blendtec blender. I have made it in a food processor before, but it is much harder to get a really thin crust that way for some reason. The blender seems to pulverize the flour more or something and makes it possible to roll it out thinner. With a food processor you might be able to get a thin crust with some good elbow grease.

Cut the cold butter into a few pieces and add butter and flour to blender. Pulse until combined. The flour will go from looking powdery to looking like a lightly damp sand almost. Add the yeast and water and salt if desired. Pulse until dough forms a ball.

Remove from blender and place on a lightly floured surface (I usually place on lightly floured parchment paper. I also flour my hands and lightly flour the dough top). At this point I usually divide the dough into 2 pieces to make 1 large pizza and 1 med/smaller pizza (or 2 individual size pizzas) for the little monkeys as they don't always like the "adult pizza). Roll out using a rolling pin to the desired thinness. Pierce all over the crust with a fork.

Parbake your crust at 400 degrees for approximately 3 minutes. I pulled my out of the oven as soon as I started to see bubbles forming. I bake directly on my oven rack with the parchment paper, but you can use a pizza stone, just your rack or a baking sheet if you would like (it might be less crispy though).

Remove and add your toppings of choice.

Bake pizza at 475 degrees for about 10 minutes. I honestly didn't keep track of time last night as I just sort of stood there and watched until the pizza looked brown on the edges and the cheese was all melted and bubbly.

Kale Walnut Pesto Sauce 

Ingredients 
-1 bunch of kale
- 1/2 cup to 1 cup of basil leaves
- 1/2 cup unsalted walnuts (The recipe actually called for almonds, but we eat plenty of almonds and Big Monkey is under orders from the allergist to consume more walnuts during treatment and he's not crazy about their texture whole)
-1/4 cup olive oil
- 3 cloves of garlic 
- 1 tsp of salt (or more to taste, I accidentally put WAY more than this and it was a little too salty but still good)

Typically pesto sauce includes Parmesan cheese. This recipe called for 1/2 cup, but I left it out and didn't miss it at all. So add it if you think you need it.

Remove the center stalk from the kale leaves and place all ingredients in a food processor. Pulse until smooth.

This will make way more than you need for the pizza. So place in jar in the fridge for a few days. I plan to use mine on pasta tonight.

Tuesday, May 7, 2013

Super Yummy Homemade Whole-Grain Pancake Mix

Ok, you know if I'm posting about a pancake mix that this must be good. A pancake is a pancake and not that hard to do well, right? Well, I think out of all the pancakes I have tried making at home, these have the best flavor.

The best part? I have a bag of the mix ready to go in my freezer for the next time! The first part of this recipe tells you how to make the pancake mix. The second part tells you how to make the actual pancakes. You can substitute ingredients if you would like (I did from the original recipe, which is how I got to this), but I think it will change the flavor profile.

Homemade Whole-Grain Pancake Mix

4 Cups Whole Wheat Flour (I use King Arthur brand)
1 cup White Whole Wheat Flour (again, I use King Arthur brand)
3 1/2 cups old-fashioned rolled oats, lightly ground (you want them chopped fine but not a powder)
3 tablespoons sugar
3 tablespoons baking powder
1 tablespoon salt
1 tablespoon baking soda
1 cup olive oil 

Put all dry ingredients into a mixer with a paddle. Mix on slow until well combined. Drizzle olive oil into the dry ingredients while mixing on slow speed. Mix until well combined.

Store this mix in an airtight container for up to 2 weeks at room temperature or indefinitely in the refrigerator or freezer. (I do not claim to have any food photography skills, so no judgement please!) 


Pancakes

This recipe makes a nice tall stack of pancakes. I like to make pancakes once and have enough to feed my entire family plus have another day or two worth to put in the freezer. You can cut this recipe in half or even down to a third. 

3 cups homemade mix
3 cups of milk
3 tablespoons apple cider vinegar 
3 large eggs 

Combine the milk and apple cider vinegar, stir, and let sit for 5 minutes in a separate bowl or measuring cup.

Mix the pancake mix and eggs together. Then add in the milk and apple cider vinegar mixture. If the batter is super runny (mine was, but I might have used a little too much milk), add a little extra pancake mix. Don't make the batter too thick though as it will thicken while it sits. Let the batter rest for at least 20 minutes before cooking (this is where it thickens a little on it's own).

Cook however you like to cook pancakes! I coat my cast iron skillet with a little butter and then cook. Apparently, I had my heat a little too high today as my pancakes are a little darker than the golden color I prefer. They still tasted amazing both plain and topped with a little pure maple syrup.

Enjoy!


Friday, March 29, 2013

Butternut Squash Mac n "Cheese"

I have been MIA lately as a lot has been going on in the Monkey household. All of the happenings have been good (like spending a 4 day weekend camping with the monkeys and watching them get filthy), but keeping us busy! Hopefully I will get a chance to update on everything very soon.


We've had a lack of school-related posts too for various reasons. We are still learning at home, but Big Monkey has mastered most of the work that we had set aside for the school year. So we are doing some "alternative" learning through living life for the moment as we revise and replan! More school items to come later this spring and summer (yes, we will continue learning through the summer)!

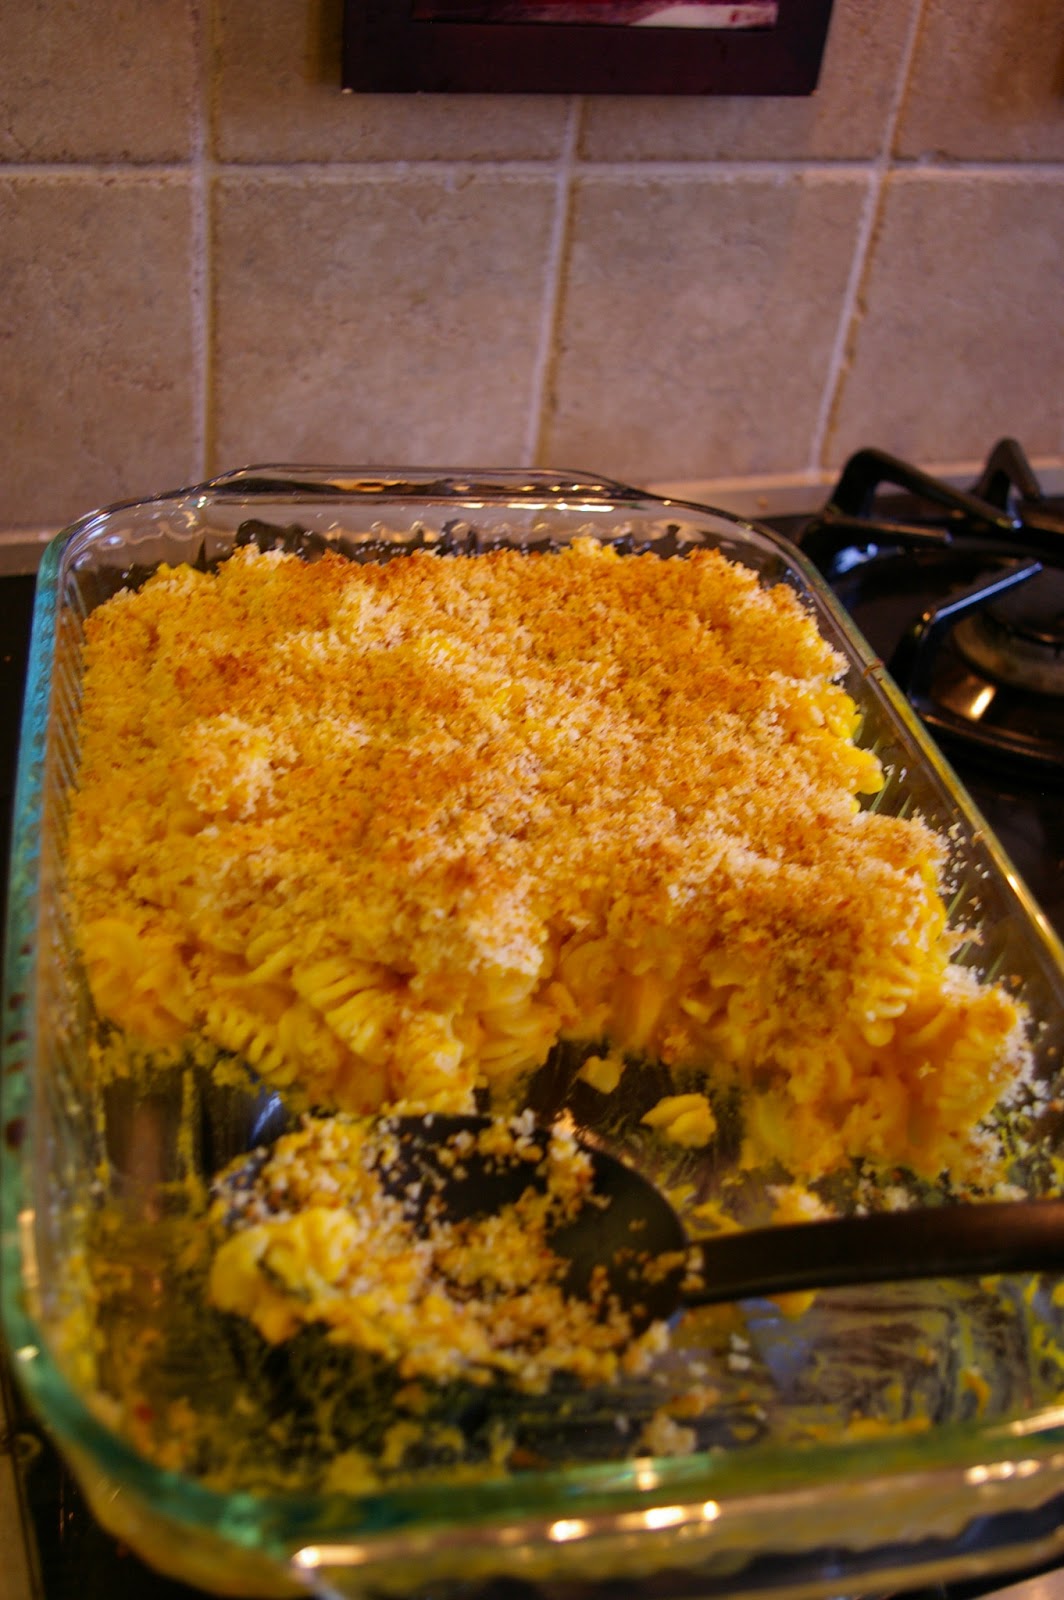
Anyway, tonight I remade a very yummy butternut mac n cheese recipe that my family loves. The original recipe was from Better Homes and Gardens and contained bacon, milk, cheese, and butter. It was divine, but still didn't fulfill my desire to find a mac n cheese that I could feed my boys as an entire, complete meal and feel 100% guilt free about giving it to them.


We are not a vegan household by any means. We've tried twice and failed within a week. I have some barriers to becoming vegan - namely eggs. However, we are still trying to cut back on our consumption of dairy and meat, so I try to find alternatives where I can. Alternatives that are natural and not soy based are even better! This fits the bill. The best part - it is toddler, preschooler, and meat loving husband approved. In fact, I'd say it is the closest mac n cheese resembling vegan recipe I've tried to date (although all the others I have tried are good, they don't make me think of mac n cheese).

Vegan Butternut Squash Mac n "Cheese" 

- 2 cups unsweetened, plain coconut milk (I use SoDelicious brand which is peanut free)
- 1 medium butternut squash (smaller will make it less creamy, larger will be more creamy) 
- 1 small yellow onion
- 2 Tablespoons nutritional yeast
- 16 oz pasta of choice - use any shape you like! 
- day old french or sourdough bread (approx a quarter loaf) 
- 2 tablespoons melted vegan "butter" (I use Earth Balance) 

Heat oven to 400 degrees.

Cook pasta according to the package directions. While pasta is cooking peel the butternut squash with a vegetable peeler (hate your vegetable peeler? These Titan brand ones are AMAZING), remove the seeds, and dice into cubes (the smaller the faster they will cook). Peel and dice the onion.

Add the milk, butternut squash, and onion to a large sauce pan or pot (I've done this in both a large cast iron skillet and my dutch oven) and bring to a boil. Reduce heat to medium and simmer until butternut squash is tender stirring frequently.

While the squash is cooking, tear your bread into chunks and place in a blender or food processor and process until you have coarse bread crumbs. Add in the melted butter and quickly process to combine. Set aside.

Once the squash is tender, you have 2 options: 1) you can just gently smash the butternut squash and onions and mix with the remaining milk until it forms sort of a thick and chunky sauce or 2) add to a blender or food processor and blend just until the big chunks are gone (just a minute or two). I prefer to blend mine and make it creamy like a cheese sauce.

Add the nutritional yeast. This is optional, but it will add some of the "tang" that cheese would bring to mac n cheese. Salt to taste (or you can salt on your plate if you prefer).

Mix the pasta into the sauce and transfer to a glass casserole dish. Sprinkle the bread crumbs over the top. Bake in the oven until the breadcrumbs are golden brown (approximately 15-20 minutes).


Serve and enjoy!

According to Big Monkey, this mac n cheese is third helping, plate licking good! In fact, both boys refused to eat their pulled chicken sandwiches and opted for the vegan mac n cheese solo. A mama can't be happier than that!


Tuesday, January 15, 2013

Amazing Beer Crust Pizza

We are officially back from the holidays! Well, actually we've been back for over a week, but we've been busy resettling in after being away for almost 2 weeks. It's good to be home!

Today I've decided to post a recipe. I was asked on Facebook about it, but I decided to make a blog post to make sure there is something interesting here to keep readership up. Nothing like some good "food porn" to do that, right?

I tend to not buy pizza out. I am not fond of delivery pizza (although Papa John's pizza isn't so bad) and I for the most part avoid frozen pizza like the plague. Mostly because ingredients are questionable and the nutritional value of any of these pizzas is terrible. However, I used to rarely make pizza because I didn't have a good crust recipe. The recipe I had tasted fine, but it took forever to make and wait to rise. The non-rising recipes I tired were terrible, until I stumbled upon this one on pinterest. I found this on the Plain Chicken blog to give credit where credit is due, although her version is made with white flour (I've made it with white flour, but try to avoid that ingredient as well). This has become a dinner we (and by we I mean the monkey boys and I) make probably about once a month.

Amazing Beer Crust Pizza - Pesto, cauliflower, and turkey pepperoni (today's topping selection)


Dough
- 2 1/2 cups whole wheat flour
- 1 Tsp sea salt
- 2 TBS cold butter 
- 1 cup of beer (my personal favorite for this dough is Red Stripe Jamaican Lager, but use whatever you love or have on hand)

If you have a cast iron pizza stone, use it (it does make a difference!). Place the pizza stone in the oven and preheat to 475 F (strangely, I do not know where to find the degree symbol on my computer!).

Get out your trusty food processor with a metal blade. Add the flour and salt. Pulse until mixed.

Add in the cold butter and pulse until combined.

Add the beer and pulse. I found with the whole wheat flour I had to add a smidge (probably not more than an additional splash) of beer, but do this after the beer and flour are mixed and you can see if it is wet or dry. The dough will appear slightly wet and a tad sticky.

Remove from food processor and place on parchment paper cut to the approximate size of your pizza stone (as you can see in my photo, my paper is bigger than my stone). Roll the dough out to the size of your pizza stone with a rolling pin (it really is easier than using your hands, trust me). My pizza never comes out round. My stone is 15" across and rolling the dough out to be this big makes the perfect thinness for baking.

Poke holes in the dough with a fork (don't forget to do this as it also makes a huge difference!). If you do forget, you can poke holes after you add the toppings.

Top with whatever you like! We have done everything from hawiian pizza (canadian bacon, pineapple), BBQ chicken (BBQ sauce, chicken, red onions, and mushrooms), veggie/pepperoni (turkey pepperoni, mixed frozen california veggies, mushrooms and red sauce), and pesto cauliflower (pesto sauce, fresh cauliflower, and turkey pepperoni). Really any topping would be amazing on this pizza!

Slide onto your pizza stone in the oven and bake for 15 minutes or until cheese is bubbly. The recipe says 12-15 minutes, but I've found that if I leave it in for less than 15 minutes the dough is not as crisp and is not done in the middle. So sometimes my toppings come out with a little char on the top, but are never burnt. I wouldn't go over the 15 minutes though!

Enjoy!

Tuesday, November 20, 2012

Recipe Pile Up

Well, I thought I'd have time to post a few recipes last week, but somehow that all slipped away from me and I ended up posting absolutely nothing!

These first two are more ideas for quick and easy meals and not so much a recipe, but I wanted to share.

Toads in a Hole
 
First, we'll cover breakfast. Toads in a hole is what we have been calling these.

A bear and 2 pumpkins

I got this idea from another friend and have also heard them called "bird's nests." Basically it's a fried egg in the middle of a piece of toast. Our twist that the boys really love? We use shaped cookie cutters to cut the piece out of the middle of the bread. Makes for some cute eggs. Here's how to do it:

Take a piece of bread and spread a thin layer of butter on each side. You can skip this step and just add enough butter to coat the bottom of the pan, but you'll get one really crisp side of the toast and one less crisp side as the first side will soak up most of the butter. Still tastes great and is a lot faster (this is actually my method of choice lately).

Use a cookie cutter to remove the center of the bread. Place bread in a heated pan (or place in pan and let the pan heat) and add the egg into the hole (the pan needs to be warm enough so the egg doesn't run out under the bread). Sprinkle with a little sea salt. Cook and then flip and cook to desired doneness. Serve! Tastes great with a sprouted wheat bread or a bread like Ezekiel 4:9 bread.

Tortilla Wrap Lunch

My good friend introduced me to what my kids like to call "turkey rollers." Yeah, I'd had the Costco version before, but never did think about making my own successfully. So I picked her brain and still frequently make the kids their favorite version - turkey, cheese, and a little cream cheese to seal it with. I've also done salami, turkey, and mustard with greens as well as sunflower butter (you could use peanut butter if you don't have nut allergies), honey, and a banana (terrific for breakfast!). Roll and slice and you're done. However, I wanted to make a more "grown up" version for me for lunch as well as make them vegetarian/vegan to go along with my reduce my consumption of animal products attempt. Note that I said attempt. It's a slow process, but one I'm determined to work toward to help lower my cholesterol. 


I decided to share the two pictured above because they were so good (so good that I ate almost half of the first one before I remembered I hadn't taken a photo!), easy, and healthy. I usually prefer flour tortillas, but this particular week I tried out some small taco sized corn tortillas. They don't "roll" as well as flour and often crack, so I ate most of these as "tacos" instead of rolls. Eh, they still tasted just as good!

The top is corn tortilla spread with a very thin layer of tofutti (tofu version of cream cheese - you could use cream cheese if you prefer) and a thin layer of roasted red pepper hummus. A very small sprinkle of feta cheese (obviously not my vegan one), a row of kalamata olives and some arugula. Yum!

The bottom is tofutti and roasted red pepper hummus topped with an avocado (I think it was an entire half of an avocado. Big Monkey ate the other half; Baby Monkey hates avocado) and arugula. Simple and oh so good!

I also discovered a great tofu coconut curry recipe this week, but I don't have the photo on my computer, so that post will have to come later! Enjoy!

Tuesday, September 18, 2012

Delicious High Protein, Whole Grain Banana Pancakes

I'd have to say that these are probably the best healthy pancakes I have ever had. I've had better pancakes, but of course they are the fatty, creamy buttermilk kind topped with all sorts of stuff not so good for you (i.e. syrup). Most healthy pancakes I find to be on the drier side and even sometimes bitter tasting. I love honey whole wheat pancakes, but they still need a dose of syrup on top to make me happy. Well, these pancakes I could eat with nothing on top (although a tad of syrup would only add to the goodness). If you don't like bananas, these won't be for you. While I used skim milk for these, it would be very easy to make them vegan by using a plain or even vanilla soy milk instead (or possibly rice or almond milk as well).


Ingredients 
- 4 ripe bananas, mashed
- 2 cups of oat flour
- 1/4 cup soy flour
- 1/2 cup wheat bran
- 2 TBS ground flaxmeal
- 1 1/4 cups of milk (if you like you batter thinner, add a little more milk as mine was super thick)
- 2 TBS olive oil

Mix everything until just wet and cook. Yum! I undercooked mine slightly so that I could freeze them and reheat later without drying them out. Since there are no eggs, there is no worry about eating them undercooked anyway!

Friday, September 14, 2012

Slow Cooker (or not so slow cooker) Potato Leek Soup

This is the best version of this soup that I have made to date, and it couldn't be more perfect! Why? Because it is versatile. Bacon lover? This soup is for you. Vegetarian? No problem. Vegan? Well, I've never tried making this vegan, but I think it could work. The first time I made this I made it in a pot and it worked well (took about an hour or so). Then I adapted it for the slow cooker, which is even better for my days chasing the Monkey boys. I've also premade this soup sans the milk ingredients, tossed it into a freezer bag, and put it in the freezer. Just defrost overnight and place in the slow cooker before starting your day.


This soup is creamy despite containing very little milk with a smokey bacon flavor and a slight peppery aftertaste. The peppery taste is from the leek, which basically looks like a green onion on steroids. I grew the leeks I used for this batch in my own garden, which was quite easy, but you can find leeks in pretty much any grocery store.

I prefer to use red new potatoes (large size) yukon golds because I like to leave the skins on for extra nutritional value and to cut out the step of peeling. Russets can be used as well, but I recommend peeling them first unless you enjoy a little grit in your soup.

I have genetically high cholesterol, which means I must strive every day to keep the saturated fat and cholesterol levels low in my diet (13mg of saturated fat for one day goes quickly). I have not been so good at sticking to this since getting pregnant with Big Monkey. My goal is to get back to that kind of healthy eating. So I used turkey bacon this time, but I really like the depth of flavor and saltiness that real bacon adds. For these same reasons I used half and half, although I should have just used nonfat or low fat milk like I have in the past. These milks provide a less creamy soup, but I usually just add a little less liquid and let the potato act as a natural thickener. It hasn't seemed to change the taste much in the past. You can also use heavy whipping cream for a thicker and creamier soup. Up to you.

Potato Leek Soup

Ingredients
- 8 large red new potatoes, washed and quartered
- 1 large leek (or 2 for more leek flavor), green parts sliced into thin ribbons (discard the white bottom)
- 3 cups chicken broth
- 1/2 a package of bacon of your choice, chopped into bits
- 1 cup half n half, heavy whipping cream, or milk

In a pan crisp the bacon. Add the leeks and cook with bacon until tender (just a few minutes). Add to crock pot. Add in potatoes and chicken stock. Cook on low for 8 hours (I'm sure you can cook on high for 4 hours, but I have not tried). When finished mash and stir potatoes in the crock pot and add the cream/milk. If you are using milk rather than a thicker cream, then add the milk slowly and stop when soup reaches the desired consistency (you're aiming for creamy and not watery). It may take less than a cup (I often cook by sight, so many of my measurements are approximate). Enjoy!

If you would rather cook this soup in a pot. Follow the directions above but simmer all ingredients except the milk for 45-60 minutes until the potatoes are soft and are starting to fall apart and make the soup thick. Then add the cream/milk and serve.